Popcorn
Popcorn is a .Net Middleware for your RESTful API that allows your consumers to request exactly as much or as little as they need, with no effort from you.
This project is maintained by Skyward App Company
Contents
- Home
- Quick Start
- Documentation
- Getting Started
- Advanced Projections
- Contexts
- Default Includes
- Sorting
- Authorizers
- Internal Only
- Inspectors
- Roadmap
- Releases and Release Notes
- Contributing
- License
- Meet the Maintainers
Latest Post
-
11/17Why popcorn
-
10/25An introduction
Popcorn > Documentation > DotNet > Tutorial: Getting Started
Ok, so you want to jump in with both feet and get Popcorn set up and running. This tutorial will walk through a simple Asp.Net Core application demonstrating the basic functionality.
All source code is available in the ‘PopcornNetCoreExample’ project in the dotnet solution.
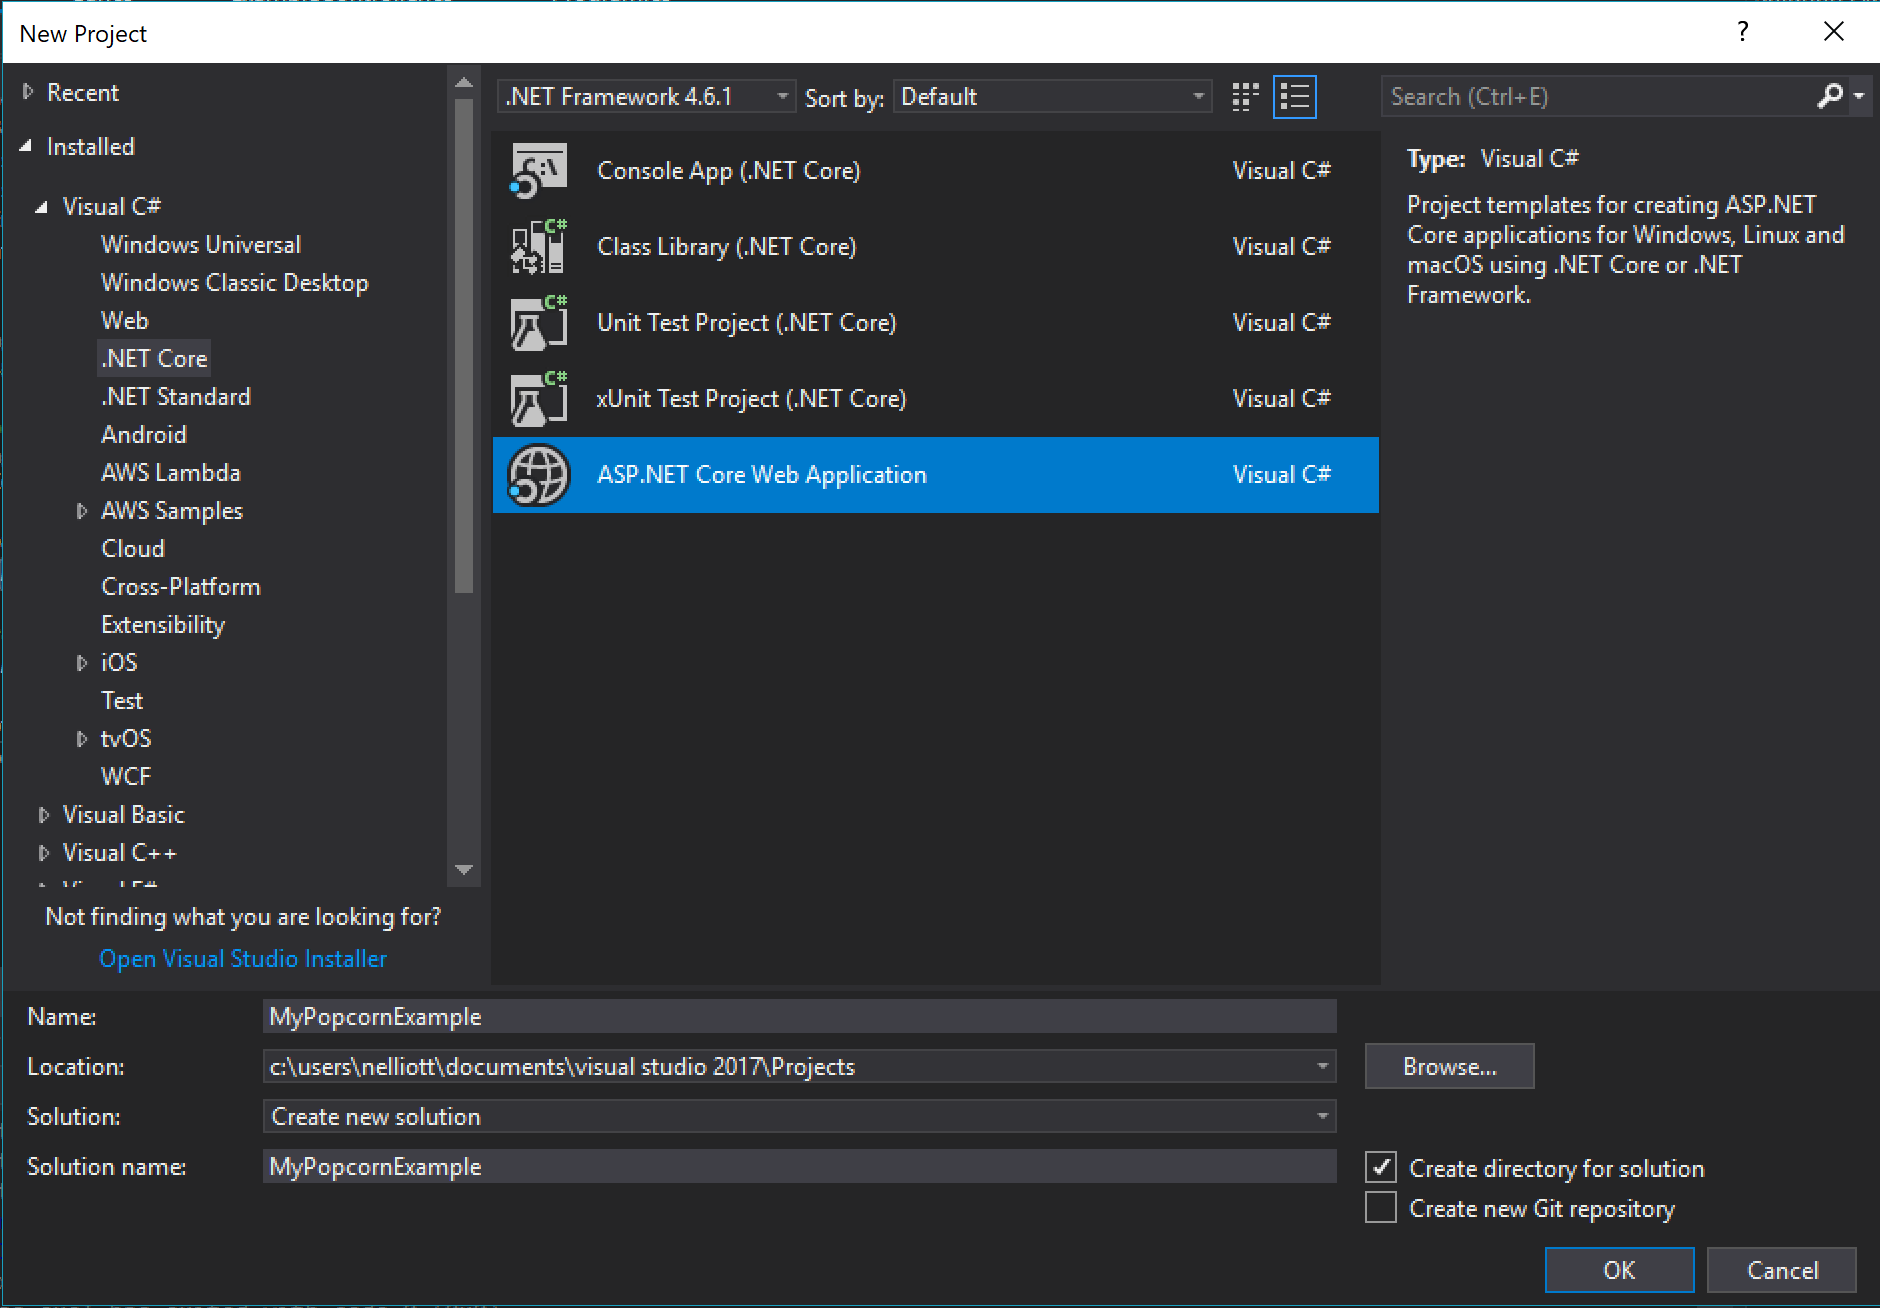
To get us started off, create a brand new ‘Asp.Net Core’ project.

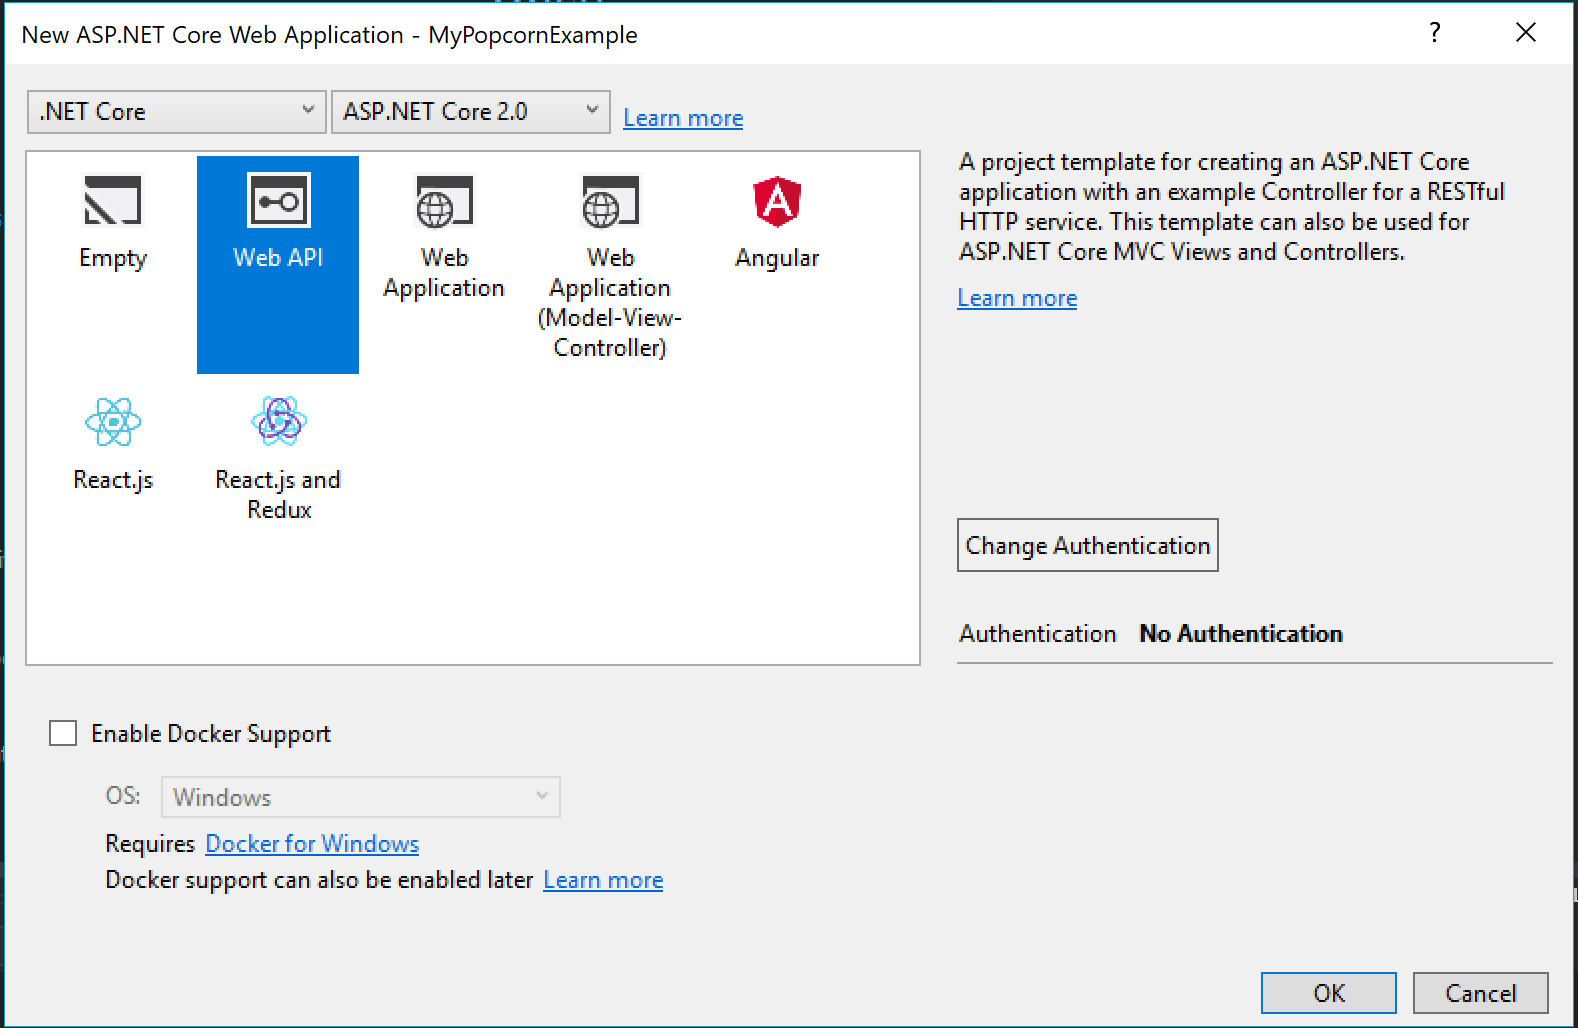
Make sure to choose ‘Web Api’ as your project type to get the appropriate templates in place.

You should now have a ‘Program.cs’ file that sets up the hosting environment, and a ‘Startup.cs’ configuring the Web Api.
There’s also a ValueController by default. We don’t need it, so go ahead and delete it. Instead, lets create an ‘ExampleController’ with just one endpoint for now.
using System.Collections.Generic;
using Microsoft.AspNetCore.Mvc;

namespace PopcornNetCoreExample.Controllers
{
    [Route("api/example/")]
    public class ExampleController : Controller
    {
        [HttpGet, Route("status")]
        public string Status()
        {
            return "OK";
        }
    }
}
Now, let’s make sure our basic app is up and running.
We will be using Postman to test our controller.
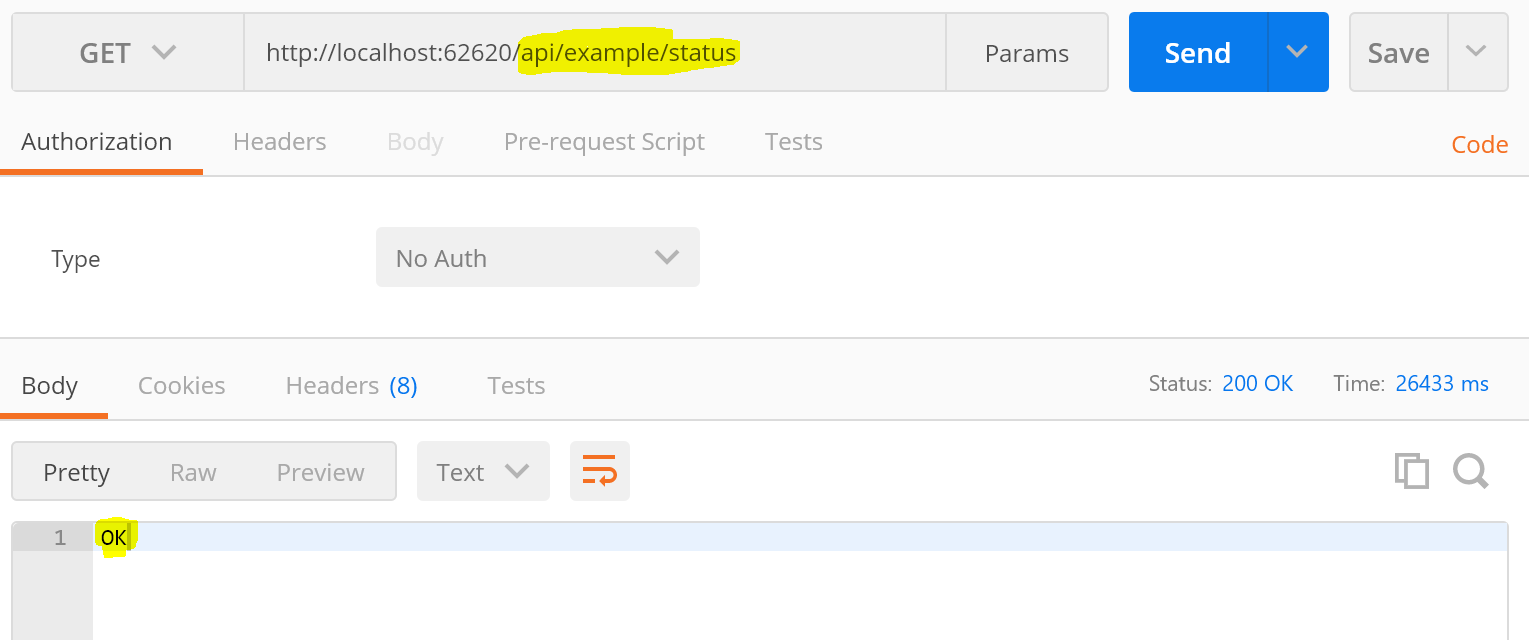
Fire it up, start your Web Api project, and execute a ‘GET’ request against your new endpoint ‘/api/example/status’

Now we can start to introduce some Popcorn!
To get started, create a ‘Models’ subfolder in your project, and add two classes: Employee and Car.
public class Employee
{
    public string FirstName { get; set; }
    public string LastName { get; set; }

    public DateTimeOffset Birthday { get; set; }
    public int VacationDays { get; set; }

    public List<Car> Vehicles { get; set; }
}
public class Car
{
    public string Model { get; set; }
    public string Make { get; set; }
    public int Year { get; set; }

    public enum Colors
    {
        Black,
        Red,
        Blue,
        Gray,
        White,
        Yellow,
    }
    public Colors Color { get; set; }
}
These are the entities we’ll be querying for via the API.
Lets add an ‘ExampleContext’ class that will act as an in-memory repository for our test data.
public class ExampleContext
{
    public List<Car> Cars { get; } = new List<Car>();
    public List<Employee> Employees { get; } = new List<Employee>();
}
We’ll need to add some test data to the project to prove that everything is working. Time to revisit ‘Startup.cs’ and add a new method:
private ExampleContext CreateExampleDatabase()
{
    var context = new ExampleContext();
    var liz = new Employee
    {
        FirstName = "Liz",
        LastName = "Lemon",
        Birthday = DateTimeOffset.Parse("1981-05-01"),
        VacationDays = 0,
        Vehicles = new List<Car>()
    };
    var firebird = new Car
    {
        Make = "Pontiac",
        Model = "Firebird",
        Year = 1981,
        Color = Car.Colors.Blue
    };
    context.Cars.Add(firebird);
    liz.Vehicles.Add(firebird);
    context.Employees.Add(liz);

    var jack = new Employee
    {
        FirstName = "Jack",
        LastName = "Donaghy",
        Birthday = DateTimeOffset.Parse("1957-07-12"),
        VacationDays = 300,
        Vehicles = new List<Car>()
    };
    var ferrari = new Car
    {
        Make = "Ferrari N.V.",
        Model = "250 GTO",
        Year = 1962,
        Color = Car.Colors.Red
    };
    context.Cars.Add(ferrari);
    jack.Vehicles.Add(ferrari);
    var porsche = new Car
    {
        Make = "Porsche",
        Model = "Cayman",
        Year = 2005,
        Color = Car.Colors.Yellow
    };
    context.Cars.Add(porsche);
    jack.Vehicles.Add(porsche);
    context.Employees.Add(jack);

    return context;
}
Now we need to introduce this data into the application as a dependency injection. Modify Startup::ConfigureServices:
// This method gets called by the runtime. Use this method to add services to the container.
public void ConfigureServices(IServiceCollection services)
{
    var database = CreateExampleDatabase();
    services.AddSingleton<ExampleContext>(database);
}
And make sure this is injected into ExampleController via the constructor:
[Route("api/example/")]
public class ExampleController : Controller
{
    ExampleContext _context;
    public ExampleController(ExampleContext context)
    {
        _context = context;
    }

    ...
While we’re here, lets add an endpoint that a user can use to query for data.
[HttpGet, Route("employees")]
public List<Employee> Employees()
{
    return _context.Employees;
}
Before we introduce Popcorn in depth, lets check that this all works, and demonstrate why we even need Popcorn in the first place.
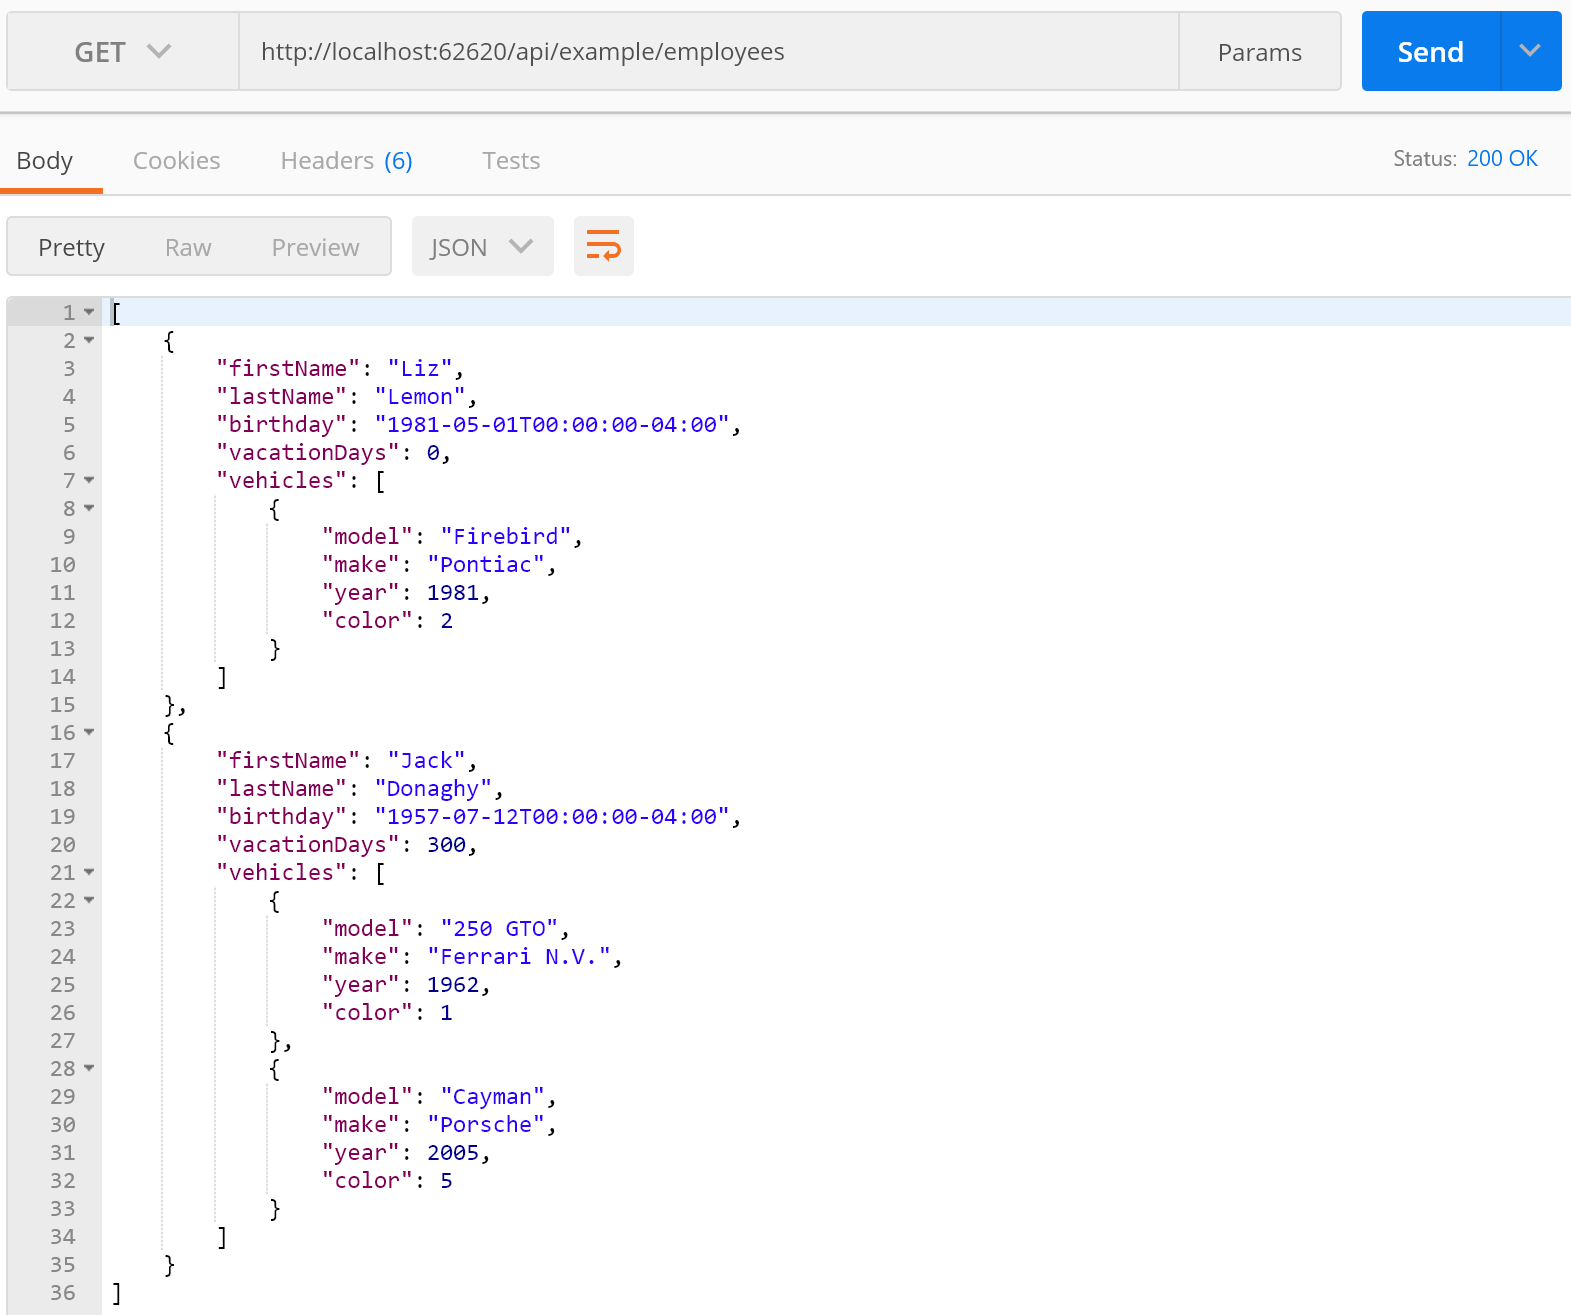
Postman will help us here. Issue a ‘GET’ to ‘/api/example/employees’

We have all our data here! Great! Our entire heirarchy has been returned to us. But… what if we didn’t actually care about the vehicles? That could be a ton of information that we don’t need, using extra data and time. So let’s add Popcorn and see how it makes us more efficient.
If you haven’t already, now would be a great time to visit the Quick Start Guide and make sure you’ve got Popcorn linked into your project correctly.
To utilize Popcorn we need to do three things (in the future, only one, so come back when v2 is released!).
Add two ‘projections’, which are the data types that format our outgoing data. A projection is simply a class that reflects what an entity
should look like before being sent to a client. Check out this answer on stack overflow for a better description.
You may be more familiar with the name DTO, Data Transfer Object, we simply prefer pronounceable names
over acronyms.
Create a ‘Projections’ folder in our solution, then add:
public class EmployeeProjection
{
	public string FirstName { get; set; }
	public string LastName { get; set; }

	public DateTimeOffset? Birthday { get; set; }
	public int? VacationDays { get; set; }

	public List<CarProjection> Vehicles { get; set; }
}
public class CarProjection
{
	public string Model { get; set; }
	public string Make { get; set; }
	public int? Year { get; set; }
	public string Color { get; set; }
}
Okay, so you may be wondering why we even need these. In the future we hope to skip projections where there’s no advanced setup needed, but for now two things:
- We want to make all non-nullable types nullable, so they don’t need to be included if not desired.
- We have to ‘whitelist’ properties. Any property not on the destination type will not be included, even if explicitly requested. So if you have a property called ‘SuperSecretEncryptionKeyNeverShare’, you can exclude it from the projection and be sure that no Api client will see it.
For advanced setup, as you’ll see in later tutorials, projections give you a lot of control.
Finally, we need to activate Popcorn on our pipeline and let it know about the projections. Back in Startup.cs:
// This method gets called by the runtime. Use this method to add services to the container.
public void ConfigureServices(IServiceCollection services)
{
	var database = CreateExampleDatabase();
	services.AddSingleton<ExampleContext>(database);

	// Add framework services.
	services.AddMvc((mvcOptions) =>
	{
		mvcOptions.UsePopcorn((popcornConfig) => {
			popcornConfig
				.Map<Employee, EmployeeProjection>()
				.Map<Car, CarProjection>();
		});
	});
}
We let the MVC pipeline know we want to use Popcorn, then configure Popcorn with two mappings, Employee -> EmployeeProjection and Car -> CarProjection. Again, in the future we will have features to auto-detect simple mappings like these or obviate the need for a projection at all.
To demonstrate, first call the same endpoint ‘/api/example/employees’ and verify it looks the same:
[
    {
        "FirstName": "Liz",
        "LastName": "Lemon",
        "Birthday": "1981-05-01T00:00:00-04:00",
        "VacationDays": 0,
        "Vehicles": [
            {
                "Model": "Firebird",
                "Make": "Pontiac",
                "Year": 1981,
                "Color": "Blue"
            }
        ]
    },
    {
        "FirstName": "Jack",
        "LastName": "Donaghy",
        "Birthday": "1957-07-12T00:00:00-04:00",
        "VacationDays": 300,
        "Vehicles": [
            {
                "Model": "250 GTO",
                "Make": "Ferrari N.V.",
                "Year": 1962,
                "Color": "Red"
            },
            {
                "Model": "Cayman",
                "Make": "Porsche",
                "Year": 2005,
                "Color": "Yellow"
            }
        ]
    }
]
A few things to point out: The casing has changed due to our internal popcorn settings (FirstName instead of firstName).
Also, our Colors enumeration has gone from a numeric format (1,5) to textual (Red, Yellow), but this can all be configured to your tastes.
To start seeing the real power of Popcorn, lets make a couple of advanced calls. Maybe we only want our Employee’s names? Make a GET request to ‘/api/example/employees?include=[FirstName,LastName]’:
[
    {
        "FirstName": "Liz",
        "LastName": "Lemon"
    },
    {
        "FirstName": "Jack",
        "LastName": "Donaghy"
    }
]
Now we only transfer the data we really need!
The include syntax can be referenced into sub-entities too. Try a GET request to ‘/api/example/employees?include=[FirstName,LastName,Vehicles[Make]]’:
[
    {
        "FirstName": "Liz",
        "LastName": "Lemon",
        "Vehicles": [
            {
                "Make": "Pontiac"
            }
        ]
    },
    {
        "FirstName": "Jack",
        "LastName": "Donaghy",
        "Vehicles": [
            {
                "Make": "Ferrari N.V."
            },
            {
                "Make": "Porsche"
            }
        ]
    }
]
As you can see, you can use this syntax to make the response data as light or as deep as you need for any given situation.